
When I arrived at Mary’s house in early November WS and JR need a few repairs. I figured taking care of those things would be easier to do when I’m stationary, and where I could more easily get help if I needed it.
1. Joy’s ear. That problem didn’t start until after I was here but needed to be taken care of right away. Her left ear started itching, was red inside, she kept shaking her head and scratching. She wasn’t at all happy to let me look in it or clean it. Soo….off we go to the vet again. All he was sure of was a lot of inflammation and swelling and fluid in her ear, so we are treating it as an infection with meds for inflammation, an ear wash and an antibiotic. I will call him tomorrow to let him know how she is doing, but it doesn’t look red inside anymore and she’s not so particular about me touching it.

Joy….younger.
2. JR (Joy Ride, my truck) had a recall notice. I make an appointment at the Ford dealership where I bought her and have that taken care of, along with a general check up. The battery is doing exceptionally well for closing in on 5 years of age. The breaks are fine for now but need to be watched, they tell me.

I’m happy with my tow vehicle, a 2012 Ford F150, EcoBoost. It has a little over 60,000 miles on it now.
3. Awhile back I blew my GFCI outlet and couldn’t reset it. I read up on replacing the outlet and got some advice from the Casita Forum….still, I’ve never replaced an outlet or even watched someone else do it. I remove the old one but don’t have the confidence to put the new one in. Laura and Joel (The Joel Pole Man) were coming over for a visit so I ask if Joel would mind doing it. He brings his little bag of tools and in 10 minutes I had a functioning GFCI outlet, AND I get to watch him do it, so hopefully next time I can do it myself. Thank you Joel!
4. For a long time I’ve wanted to get a sewer hose holder…one of those long white tubes that attaches somewhere on an RV. Casita people usually put them between the front of the trailer and the propane tanks. Finally I order one on Amazon. It arrives and I secure it with zip ties to the above mentioned location. One problem with the tube is that people find the fittings on some brands of sewer hoses are just a tad too wide to fit inside. Mine happens to be one of those brands so I just file the fittings down about a quarter of an inch, and now it fits! This eliminates a good sized plastic bin from the truck bed.

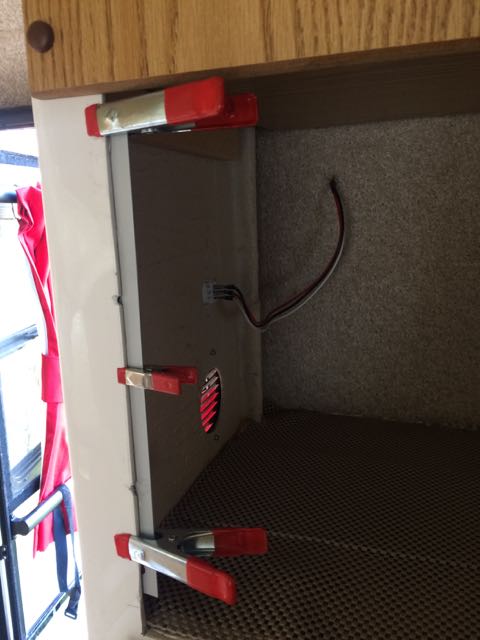
My built-in microwave hasn’t been working right for awhile now. I really do like the ‘luxury’ of a microwave when I have electricity (I can’t run it on solar power).
The built-in needs to be removed and it is riveted into place. I find out that I need a drill to remove rivets. I don’t have a drill but feel it is something handy to have around, so I begin asking for advice and recommendations about cordless ones. After exchanging a number of emails with Konrad at Little House Customs in Camp Verde, AZ (who did some mods for me a year ago), I decide on the same drill he uses, and 18 Volt Ryobi. It comes with 2 batteries, a charger, and a case to put it all in. I also buy some drill and driver bits.

Here it is!
After more emails with Konrad I actually get up the courage to start the job. Removing the rivets goes smoothly after I get the hang of it. Then I am able to shimmy the oven out of the opening with some difficulty.

Empty hole.
I had ordered a new cupboard door from Casita, and i just need to pop it into place….yeah, right.
Microwave ovens no longer come standard on Casitas, so unless you order one, you have a nice empty storage space there, covered by a door that opens from the top and gives a bit of wider temporary counter space when it’s open. It has two hinges on the bottom which means I’ll need to drill 4 holes into the fiberglass. Also, the door doesn’t fit properly. The latches don’t reach out far enough on the sides to latch against anything so I’ll have to figure a way to extend the sides of the fiberglass opening. I don’t believe this is an error on Casita’s part, I think it’s a one size fits all situation, and ‘you work it out.’ Also, though I asked Casita to send all the hardware, they failed to send the screws, so I remove one from another cupboard door hinge, in hopes of finding the right size screws.
After thinking for a few days about what to use to extend the sides of the opening to reach the latches (needs about 1/2″ in each side), I go to a hardware store and wander the isles. A couple of clerks don’t have any good ideas, though one helps me find the right screws. After honestly, a good hour of wandering and changing my mind about a few different items, I end up with a metal yardstick which I ask to have cut to the sizes I need. I also buy epoxy glue.
When my courage returns to continue this project, I start with measuring and boy, I measure very carefully because I don’t want to drill holes in the fiberglass, in the wrong place. Also I don’t want to drill the holes too big, so I start with a very small drill bit. Can’t get the screw in so I drill again with the next size drill bit. Still too tight, so I go for the next size up.
Oops. Too big. Dang! Just what I was trying to avoid, and I did it anyway. I put epoxy on the screws, hoping that will hold them. It doesn’t.
Okkkk….so lets work on extending the sides of the hole so the latches will work. Again, I measure very carefully, then glue the pieces of the yardstick in place, and clamp them.
This part of the process seems to be working. They are in the right places and the epoxy is holding firmly.
Now back to the store to figure out what to do about the screws. I figure I should get the next larger size, but now I’m at Walmart and I can’t find any screws that are labeled with the size I need. I end up buying a latch kit (same price as a package of screws), that LOOKS like the screws are a little fatter than the ones I have. I also buy wood filler.
I fill the holes, dip the new screws in epoxy glue and screw them in and OMG, they actually tighten and seem to be holding! Yay!
I give it time to dry, and then close the cupboard. But what’s this?? NOW the cupboard door fits tight against the piece of wood above it….a bit TOO tight. The way I measured, and the way it fit with the first screws, I had about 1/16′ leeway.
Well screw it! (Pun intended 🙂 I’m done. The cupboard door will be a snug fit and maybe that will help serve to keep it closed while I’m bumping down the road. If it becomes a problem, I suppose I can sand down the top a bit.

Here is the new microwave….the smallest I can find at .7 cubic feet and 700 watts. The wood thing is the open cupboard. The square plastic thing is the latch housing on one side. There is another on the other side. You can also see the pieces of yardstick. (sigh). Now I have a little more storage space in there. I forgot to take a picture of it with the cupboard closed.
I’ve also been cleaning and organizing, and by that I mean I have taken just about everything out of WS and cleaned really well, plus, before I put it all back in, I’ll make a decision about if I need each and every item.

Pulling it all apart.
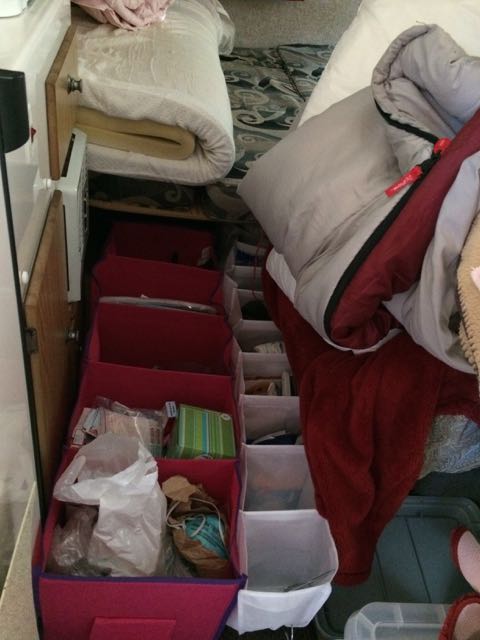
These holders are made to hang in a closet (and I do have one hanging in the closet), but I’ve started using them under the bed too. I used to use small bins, but then I have to lay on the floor and get half way under the bed to reach the last bins. Now I just have to pull, and it’s like a drawer.
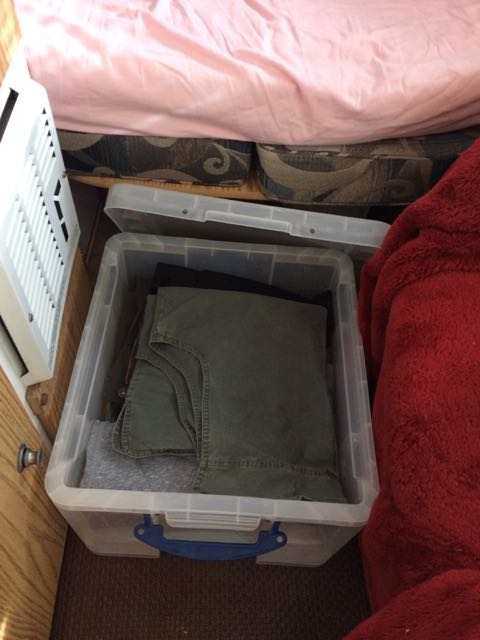
I do still use one good sized bin though, and I pack cloths in it.

I keep it right there, and by pulling it out a little way, it’s used as a step for the dogs to get on and off the bed with. I cover it with a small rug so it’s not slippery for them. And it looks nicer too.
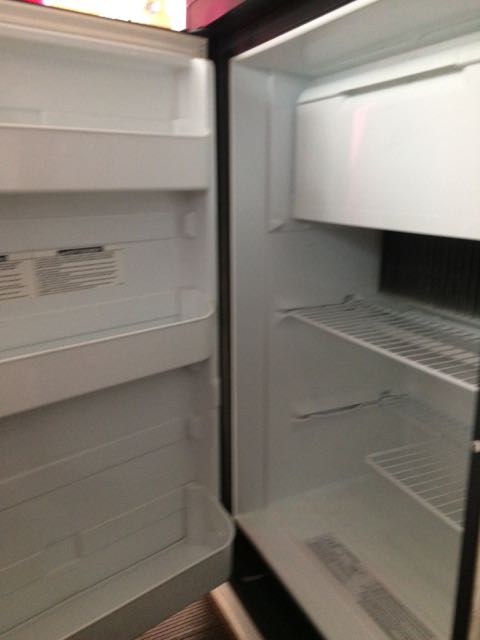
I also defrost and clean the fridge.
As far as I know I have one more project and that is to fix the old, or use a new closure on one of the outside storage doors on WS. The one on there has been causing me no end of trouble and I know that this seems like a two minute job to some….it seems like a pain in the butt to me. I’ll figure it out though!
Next post will be about Joy’s new wheels! 🙂
3

Wow! That’s a lot of cleaning and project completion! I am beginning to realize that storage is the biggest issue going full time in a small RV. Good idea with the closet organizer thingy. Also agree all of this is easier when you’re somewhere ‘home.’ Glad that Joy’s ear is getting better too.
Hi Dawn,
Yes storage is a major issue, and my truck bed is pretty much my garage. There is really very little storage space in the Casita. There IS the closet, and mine becomes a black hole every time I turn around. I forget what I dumped in there and have to dive headfirst into it…literally…to clean it. I also keep the dog food in there.
It’s a challenge though to keep it semi organized, and one that I enjoy!
Whew!
✌🏻️
Wow! I’m so impressed with the way you tackle these projects! We had to replace the microwave on our Rialta a couple of months ago….the Samsung it came with had a recall; it was a fire hazard. So out it went, and we lived with an open shelf for a while. But when the time came to put the Rialta on the market we had to do something, either build a door and install it, or install another built in microwave, which is what we decided to do. I carefully checked dimensions on Amazon, and selected one that fit perfectly! But I had my clever and handy hubby to do all the dirty work. I sure do admire your can do spirit!
Also was impressed with the way you used the closet organizers. We kept so much stuff under there, but I always had to crawl on my tummy to get stuff, and that got old after a while.What an elegant solution!
Since selling the Rialta we have been on the lookout for a used 17 foot Bigfoot. We were truly lucky and found one in the state of Washington. It’s now safely home, winterized, and tucked under a tarp and waiting for spring!! So we have joined the ranks of the fiberglass egg owners!
Congratulations on your Bigfoot Sharon! That sure gives you something to look forward to in the spring!
So you’ve had an experience with a built-in microwave too. Seems amazing that you were able to find another one to fit in there.
Yup, I was doing the tummy crawl too…so nice to be able to pull the closet organizer out like a drawer.
Hi. Lynda Jerome here. I have an 2012 Casita. My sewer hose fits into a hollow bumper in the rear of the camper. There are rubber caps on each end of the bumper which snap off when you want to get the hose out to empty. Does your bumper have this feature? Lynda
Hi Lynda! Yes my Casita has a hollow rear bumper too, but my sewer hose doesn’t begin to fit in there. Very convenient if it works for you! I’m so glad to get mine out of the back of the truck.
Awesome!!!! You rock Mickey!!!
Hi Krystina, 🔩🔧🔨😀
You must be looking forward to Christmas with the little one!
You are one amazingly handy woman!! I am truly impressed. So glad you got everything worked out, and that Joy’s ear has gotten better. Are you hanging out for Christmas, or do you plan on getting back on the road?
Hi Pat (Freespirit),
Joys ear seems to be getting better. We may have to see the vet one more time about it.
Really I’m not very handy, but maybe I will learn to be. 🙂
Not sure about Christmas yet…